Successfully using Virtual Whiteboards for virtual Eventstorming in Agile Workshops
After exploring how to effectively carry out a virtual brainstorming session in our last article, today we'll dive into Virtual Eventstorming. Learn how to implement this creative method online, especially for Agile Workshops, what preparations are needed for Remote-Teamwork, and benefit from our extensive experience. A practical case study awaits you at the end!
What Exactly Is Event Storming?
Event Storming is a creative technique, ideal for Agile Workshops, that we use to design software and to get a collective big picture of our products. Although eventstorming can also be applied in other areas like business process development, we'll focus on software development here. The goal of Event Storming is to detail a program vision to the point where concrete development tasks can be derived from it.
Important: In this article, we share our experiences with an adapted version of the Event Storming method that works for us. For example, we use sketches for visualization and simulate workflows from the user's perspective. This approach has proven effective for us, and we'd like to share our insights with you.
The Core Idea of Event Storming
Every interaction with a program can be understood as a trigger for an event. An event describes the change that results from the interaction—it represents facts within the system. For instance, if you click the "Save" button in your word processor, the document is saved, and the event "Text document was saved to disk" is generated. The event thus describes the state change caused by an action.
This specific event shows that you need a button to execute it. From this change, a multitude of further activities can arise: processes can be started, actions executed. By playing through actions and events, you get a comprehensive picture of how your program could be used.
You might think this isn't new, as there are already user stories like: "As a user, I want to be able to save my text document to disk." However, the difference with Event Storming (a key eventstorming practice) is that you're not just considering the user's perspective. What about the software developer, the designer, and all the other stakeholders? What exactly should they do? Is an interface or a button needed?
Event Storming creates a detailed picture of your program and includes all stakeholders. It's particularly suitable when people with different perspectives and expertise come together in your workshop, such as in Agile Workshops. After the workshop, everyone has the opportunity to derive concrete work tasks.
How to Conduct Event Storming
Event Storming, especially Virtual Eventstorming, is divided into three phases:
- Phase – Create an Overview: You establish an overview and clarify which people and goals are relevant.
- Phase – Get Specific: Focus on processes, interaction options, commands, and the concrete application.
- Phase – System Design: Add aggregates and derive a context map (external link).
We mention the third phase for completeness but won't cover it in detail. Our goal is to create a shared understanding of the software design and system landscape, which we achieve by the end of Phase 2. Therefore, we'll focus on the first two phases in this article on Virtual Eventstorming.
For each phase, we use sticky notes of different colors. When we first conducted Event Storming, we needed a huge wall and hundreds of sticky notes. Nowadays, especially for Remote-Teamwork, we use Virtual Whiteboards, which are key Visual Collaboration Tools, with electronic "sticky notes." You can find a wide selection of open-source Virtual Whiteboards here. If you're looking for more information or tools for eventstorming, you'll find them here.
Phase 1: Create an Overview
In Phase 1 of your Virtual Eventstorming session, the goal is to gain a comprehensive overview. We use the following sticky note colors on our Virtual Whiteboards:
- Orange for Events
- Yellow for Actors (e.g., people)
- Pink for External Systems (areas with which the program interacts but are not part of the program, e.g., an external cloud storage)
Focus on how your system is used and which relevant events can be derived from it. Write these events on the orange sticky notes. Often, thinking about one action automatically leads to the next, and you "play through" your program multiple times.
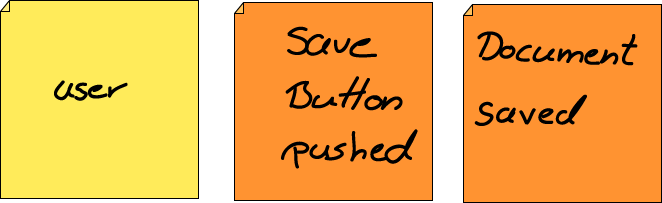
Let's take the example of a word processing software and the Save command. The user clicks on the Save button, which opens the interface to save. Expressed in events (orange), it might look like this (Note: The example contains errors; explanation follows):
Similar to brainstorming, the goal here is to collect many event ideas. However, we conduct Event Storming in a goal-oriented manner—functionalities that we don't want to implement in the first step are not included. But you can also consider all ideas to discover unexpected, easily implementable features. Just be careful not to get bogged down, as the overview on your Virtual Whiteboard can quickly become very large.
In this first phase, external systems can also appear. For example, if you want to save the text document not to the disk but to an online storage, which is not part of your system, it is written on a pink sticky note. You also include relevant events that are passed from the external system to your system, like "File was locked by another user."
After thinking through all the functionalities of your program, you'll likely have many sticky notes on your (hopefully Virtual Whiteboard) wall, a key component of Visual Collaboration Tools.
Phase 2: Get Specific!
In Phase 2 of Virtual Eventstorming, we use additional colors:
- Green for Inputs or Views
- Blue for Commands
- Purple for Rules
The goal of this phase is to model the steps that lead to an event. By the end, you'll have a very concrete idea of the program you want to develop, all laid out on your Visual Collaboration Tool like a Virtual Whiteboard.
Step-by-Step to a Concrete Model
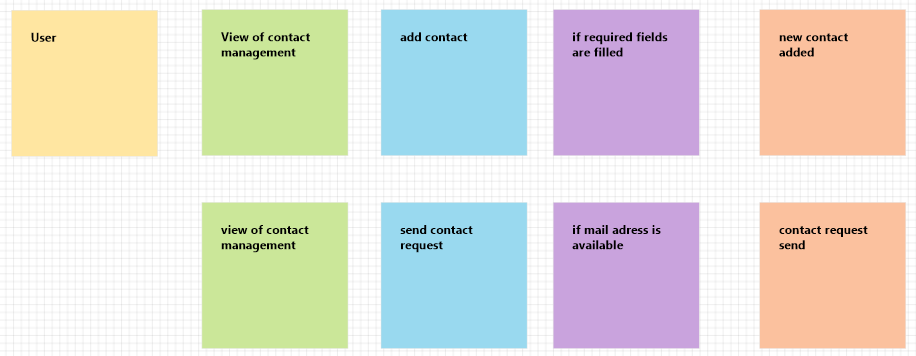
- Add View: Pull apart the sticky note for the user and the following event. Place a green sticky note between the user and the event. Here, you note the interface that the user sees and interacts with. It helps to sketch the interface with relevant interaction options so that all participants in the Agile Workshop immediately have an idea of what's being discussed.
Example:

- Add Command: A blue sticky note follows the green one. On it, you note the command that leads to the event, e.g., "Save document to disk."
Visualization:
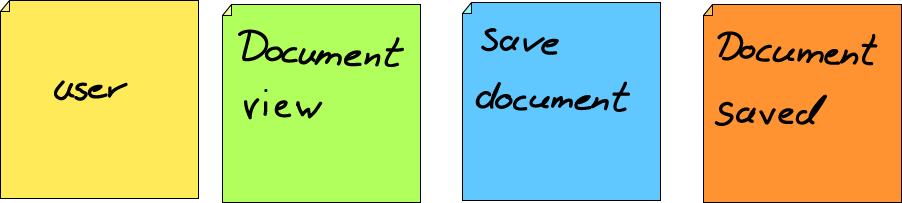
You'll notice that the event "Save button clicked" has been removed. Clicking the button itself is not a change in the system but only leads to a visual change. When you start Phase 2, you'll likely find that such false "events" have crept in. Over time, you'll learn to recognize and exclude them. Always consider whether an actual change is occurring in the system.
- Add Rules: Now, the purple sticky notes come into play. They represent rules and are placed between the command (blue) and the event (orange). For example, a program rule might prevent you from saving a protected document. This rule is written on a purple sticky note.
Visualization:

Additional Notes
- Varying Views: Views don't always have to fill the entire screen. Even a section of a page, such as a shopping cart or a product page, can be a view.
- Multiple Elements per Person: We often assign multiple green (views), blue (commands), and orange (events) sticky notes to a person, which we arrange vertically. This creates a detailed sketch of the program on the Virtual Whiteboard.
- Systems as "Actors": Sometimes we model a system as an "actor" if it can execute commands independently. In this case, the system doesn't need an interface, but we note it on a yellow sticky note and place the corresponding commands and events next to it.
Summary
We deliberately skip Phase 3. By completing Phases 1 and 2 of Virtual Eventstorming, the program is already thoroughly described, and the sketch of the interface provides sufficient detail. Each area can now derive its work packages. We'll discuss more about detailed planning for your eventstorming outcomes in a later article.
Case Study: Event Storming in Action
Mia, Stefan, and Zou engaged in brainstorming in our last article, deriving all the functions they wanted to implement. Today, they want to use Virtual Eventstorming to concretize their idea and create work packages, a common practice in Remote-Teamwork.
Preparation
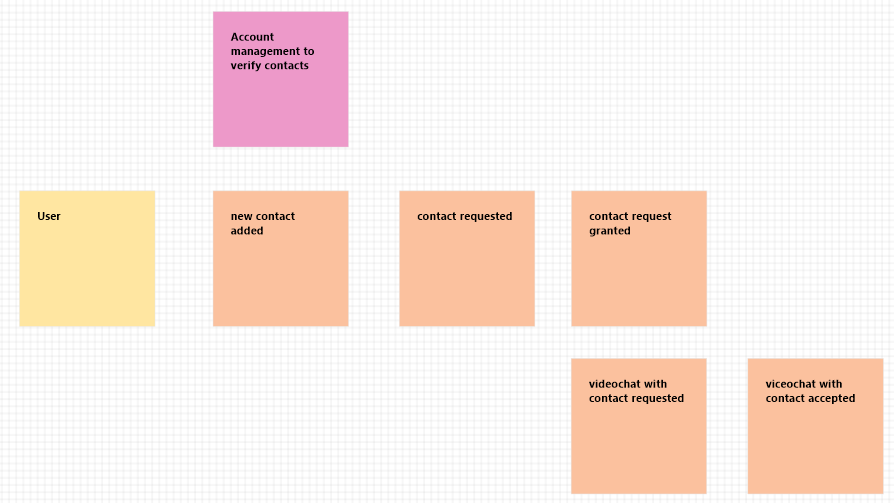
Mia selected a suitable Virtual Whiteboard, an essential Visual Collaboration Tool, in advance and created sticky notes in various colors. Mirroring the brainstorming session, the three begin to collect events. They name actors and describe external systems. An excerpt looks like this:
Grouping and Overview
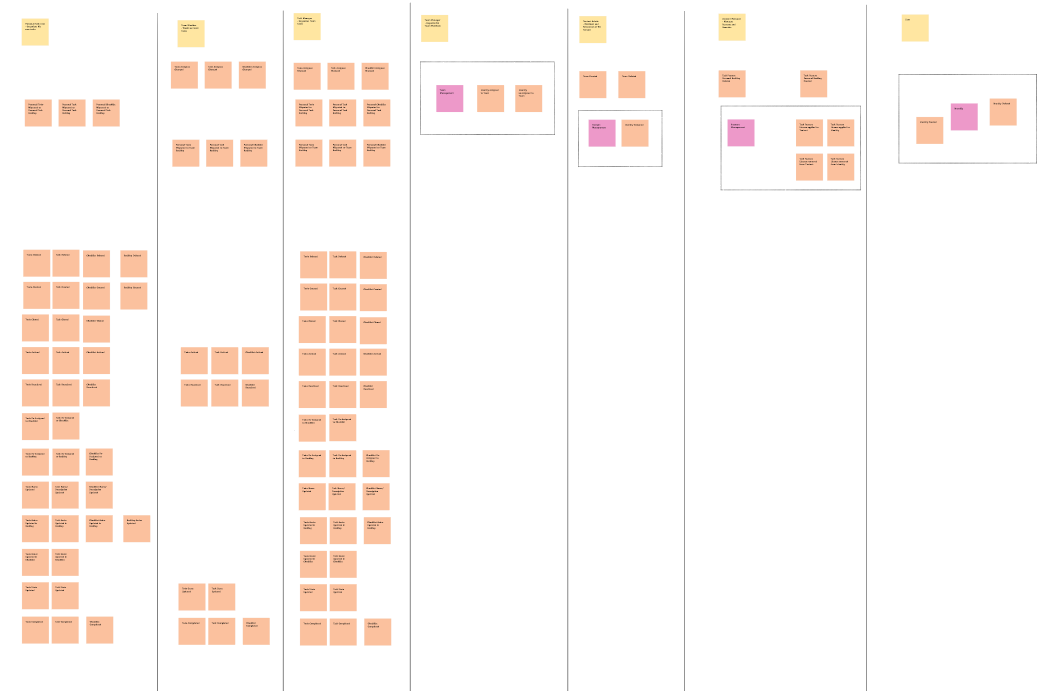
They logically group the events, discover more, and develop an initial concept of their video chat application. After about an hour, they've gathered all relevant events, identified some external systems, and described actors. A massive Virtual Whiteboard emerges—fortunately, the sticky notes on this Visual Collaboration Tool are easy to handle electronically.
The three notice that the same event can be executed by different actors. For example, a guest user can accept a video chat request, just like a registered user. The events are identical and are therefore assigned to both actors. They decide to duplicate the events and assign them to the different actors. From the linear sequence, they create a tabular overview by duplicating the virtual sticky notes and assigning them to the different actors.
Phase 2: Deepening
Feeling ready for Phase 2 of their Virtual Eventstorming session, Mia, Stefan, and Zou take the first column and list the events vertically. They place the user on the left and the events on the right. Between them, there's space for green, blue, and purple sticky notes. For each event, they consider through which view the actor executes which command to trigger the event.
Time flies, and another hour passes quickly. Mia suggests a short break. Even though everyone is enjoying the process, the concentrated work, typical of intensive Agile Workshops, is exhausting. After a 15-minute break, they continue. Zou takes on the task of sketching the views since she has an electronic pen. The contact management interface is already taking shape.

Conclusion
They spend several more hours and take several breaks to work through all the events. In the end, they've defined three views: contact management, meeting planning, and meeting execution. Satisfied, they conclude the eventstorming session for the day. As it's already late, they decide to postpone the workshop's conclusion to the next day.
In the next article, you'll learn how to properly conclude a workshop and how Mia and her friends handle it.
Note: This article is part of our series on virtual Agile Workshops and effective project planning for Remote-Teamwork. Discover more posts on project management, agile working, Visual Collaboration Tools, and self-organization on our blog.
Share your experiences or ask us your questions about online eventstorming workshops using Virtual Whiteboards! Leave a comment or discuss with us on Bluesky or LinkedIn.